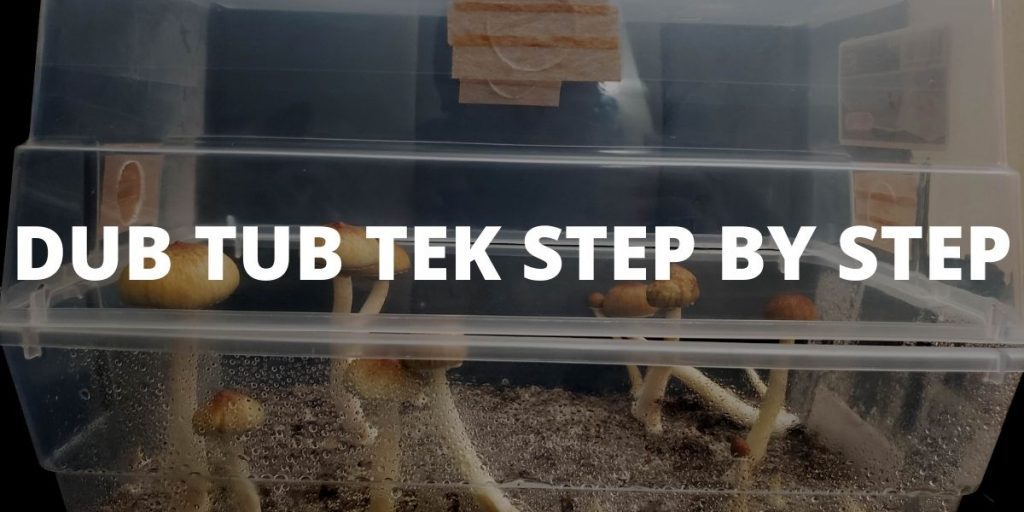
Dub Tub Tek sounds like it ought to be a new dance style, but it’s actually a mushroom-growing technique involving two tubs; double-tub technique = dub tub tek.
Dub tub is very much like monotub tek except, as the name implies, monotub uses only a single tub.
In both, mushroom spawn previously grown on some kind of grain is used to inoculate a tub full of bulk substrate in order to increase yield. The tub not only contains the substrate, it also contains the air above the substrate, making it possible to control carbon dioxide level and humidity in order to induce fruiting. The tub is a miniature growing chamber. In monotub tek and SGFC, the tub has a lid. In dub tub a second tub is placed upside-down on top of the first instead of a lid. That’s it, that’s the only difference, except that with dub tub it’s not necessary to open the tub as often.
There are many possible variations (size of the tubs, type of substrate, and so forth, but we can provide a step-by-step guide for one version of the method[i].
Why Use Dub Tub Tek?
Dub tub, like any other cultivation technique, has its pros and cons. The first question is whether to spawn to bulk at all, as opposed to fruiting directly from jars of grain or birthing cakes. The second question, once one has decided to spawn to bulk, is whether to use monotub or dub tub tek.
Cakes vs. Bulk
Beginners to growing magic mushrooms are usually directed towards some version of cakes, PF Tek being one of the most popular and reliable. There are several advantages to cakes:
- PF tek and its relatives involve simple versions of a lot of foundational mushroom-growing skills, making it a good learning exercise even if you plan on moving on to other methods.
- Growing cakes requires very little specialized equipment or materials, making it a good option for people who don’t yet know if they like mushroom cultivation.
- Yield is typically low—that’s actually a good thing for people growing an illegal crop (not that we can condone any such activity!) who don’t intend to use a lot of mushrooms. Legal consequences are typically much more severe for people caught with a large supply.
- Cakes take up less space, making them more discrete.
- Each cake is its own independent crop. That means a grower who starts six jars on grain and loses half of them to bad luck or newbie mistakes or whatever else can still fruit the other three and get a harvest. With a bulk method, all six jars would go into the same tub, so if anything goes wrong, the whole crop is lost.
There are also several advantages to bulk[ii]:
- Yields are larger—that’s better for growers who want to supply friends or to sell and thus go through product fairly quickly. It’s also a good option for people growing culinary mushroom species, and who therefore use mushrooms by the cup, rather than by the gram.
- Return on investment is better; although bulk grows are slightly more expensive than cakes, yields are so much larger that the per-gram costs of the result is much lower.
- The growing process is generally simpler and easier.
Monotub vs. Dub Tub
The advantages of a dub tub are height and stability[iii].
A monotub of the same width and length will be half as tall (and some of that space will be occupied by substrate) as a dub tub set-up, and with smaller tubs and larger strains, mushrooms can bump up against the lid. They will then either turn and grow sideways and tangle themselves up (complicating harvest), or they will push the lid off, ruining your humidity control. Dub tubs don’t have that problem.
Dub tubs also have a much more stable internal climate. Having more air-space inside, they don’t need to be opened as often for ventilation, meaning more of the humidity stays inside where it belongs.
The only real disadvantages are that you need to buy twice as many tubs—that can get expensive—and if you’ve got multiple tub-set-ups going at once, dub tubs don’t stack neatly.
How to Make a Dub Tub Tek
Before spawning to bulk, the mycelium must first be grown on grain in jars. We’re not going to include instructions for that here, since we’ve already covered that under Wild Bird Seed Tek and other articles. Note that the following recipe and instructions are for four six-quart tub set-ups. There is no reason you can’t use tubs that are larger or smaller than six quarts, and no reason you can’t do just one at a time—or more than four at a time. You’ll just have to adjust the math of the recipes if you want to make these basically arbitrary decisions differently and we have.
Materials Needed
- Eight six-quart translucent (or transparent) plastic tubs with lids (actually, only four of them need lids)
- One five-gallon bucket
- A pressure-cooker (and a working stove!)–optional
- Oven bags—optional
- A squirt bottle for water
- A source of clean water (tap is fine, so long as your tap water doesn’t have a lot of chlorine or other disinfectant)
- Black paint
- Micropore tape
- Rubbing alcohol
- One brick of coco coir
- One cup used coffee grounds
- Four quarts of fully-colonized grain spawn
- One quart peat moss
- One quart vermiculite
- Pickling lime (the recipe only needs four table spoons)
- One cup crushed oyster shells
Step by Step Instructions
First prepare the tubs.
- Set aside half the tubs until much later.
- Figure out how deep the substrate and spawn are going to fill the remaining tubs and mark that depth. Then paint the outside of the tubs below that mark black. The idea is to prevent light from striking the sides and bottom of the substrate—the mycelium will try to produce mushrooms wherever it can see light, and you don’t want mushrooms forming squashed up against the tub wall. The paint goes on the outside so you don’t have to worry about whether the paint might hurt the mycelium.
- Drill or cut several small holes in the lid and cover the holes with micropore tape. This way, the mycelium can breathe, but you won’t risk contamination before colonization of the bulk substrate is complete.
- Clean the tubs thoroughly and disinfect using the alcohol (the disinfection may have to wait until you are ready to fill the tubs, if you don’t have sterile storage).
Next, prepare the substrate.
- Mix the coir and coffee grounds together in the bucket.
- Add one gallon of boiling water—you may want to boil multiple smaller pots of water, rather than one big pot, as it will take less time that way. Cover and let sit for 15 minutes.
- Stir thoroughly, making sure all clumps are broken up. Re-cover and let sit until cool enough to handle.
- Sterilization using a pressure-cooker is optional; some growers find that the boiling water provides adequate sterilization, while others prefer to err on the side of caution by also using a pressure-cooker. If you choose to use the pressure-cooker, load the substrate into oven bags first so that substrate can’t get loose and clog the pressure-cooker valve. Poke two vent holes in the bag, then squeeze out any air from the bag and cover the holes with micropore tape so that the bag doesn’t swell up and pop. Let the substrate cool afterwards.
Now it’s time to load up the tubs.
- Sterilize the tubs and lids, if you haven’t done so yet, and THOROUGHLY clean yourself, your clothes, and shoes (if any), and anything else likely to come near the substrate. Growers often go so far as to brush their teeth just prior to getting to work.
- Add three quarts of substrate and one quart of spawn to each tub.
- Mix the substrate and spawn very thoroughly, making sure to break up all clumps.
- Make sure the mixed material lies flat in the tubs, but do not compact it. Flatness makes fruiting easier, but the substrate must remain loose and fluffy or the mycelium will have trouble growing through it.
- Put the lids (which have vents, remember) on, and set the tubs aside for six to ten days. Do NOT open them for any reason during this time. Light is not necessary. Temperature control is important. Ideal temperature may vary somewhat depending on the species and strain you are trying to grow, but 77-80° F. is common.
Next come casing and fruiting—and the use of those other tubs! Casing means covering the colonized substrate with a layer of some non-nutritive material in order to help retain moisture (check with a hygrometer) and further protect against contamination.
- Mix the dry peat moss, vermiculite, lime, and oyster shell together. Mix thoroughly.
- Add two cups of water and mix well.
- Put the mix into either jars or an oven bag and sterilize in the pressure-cooker. Let cool.
- While the pressure-cooker is cooking is a good time to find the four other tubs. Clean them thoroughly and disinfect with alcohol. Disinfect yourself, so far as possible, as well. Now that the substrate is fully-colonized, the risk of contamination is very low, but it’s best to be safe.
- Open the filled tubs and cover the substrate with a quarter-inch of casing material. Make the layer as even as possible.
- Mist the casing surface, the inner walls of the lower tub, and the inner surfaces of the other tub. Place an upper tub on top of each lower tub, like a very tall lid. You’ll want to be able to get in there fairly easily, so don’t duct-tape them together, but do something so the upper tub won’t just slide off if jostled.
- Make sure the tubs have at least some light—indirect is fine, and it need not be very bright, but they can’t be in the dark anymore. Keep them at a cooler temperature than before; 68-72° F. is a common range. Open the tubs, mist, and fan several times a day.
Pinning should begin within 14 days, but do not cease misting and fanning until the mushrooms are ready for harvest. After the harvest is complete, then “dunk” substrate to trigger the next flush. The procedure is to weight the substrate (being fully-colonized, it will act like a giant cake and could float) and then pour in enough water to cover. Let sit 24 hours, then pour the water out and return to misting and fanning. You should get several flushes before you have to start over with new substrate.
If you find the Dub Tub too complicated you might want to look into growing kits or grow bags.
References:
[i] (2016). Making. Shroomtopia
[ii] Mr. Mushroom (2011). PF TEK vs. Monotub Discussion. Shroomery
[iii] Ryan (n.d.). Monotub vs. Dub Tub: Which Should You Use? The Daily Dabble