Bucket Tek is a method of cultivating mushrooms in buckets that relies on growing side fruiting species, using moderately nutritious bulk substrates, and employing substrate pasteurization. This approach is perfect for beginners or hobbyists to start growing mushrooms as it doesn’t require costly equipment, special skills, or prior experience, and most importantly, produces a large mushroom yield with minimal effort. This article will comprehensively explore the various aspects of the bucket mushroom cultivation technique and offer a detailed, step-by-step guide to growing mushrooms in buckets.

Why do Bucket Tek?
There are several good reasons why someone might want to use the Bucket Tek when growing mushrooms.
- Simple and Newcomer-friendly: The Bucket Tek method is simple and beginner friendly as it does not require prior knowledge or expertise.
- Accessible and Cost-effective: This method does not require intricate equipment or expensive tools.
- Efficient and Consistent: The Bucket Tek method is known for its consistently high mushroom yields with minimal effort.
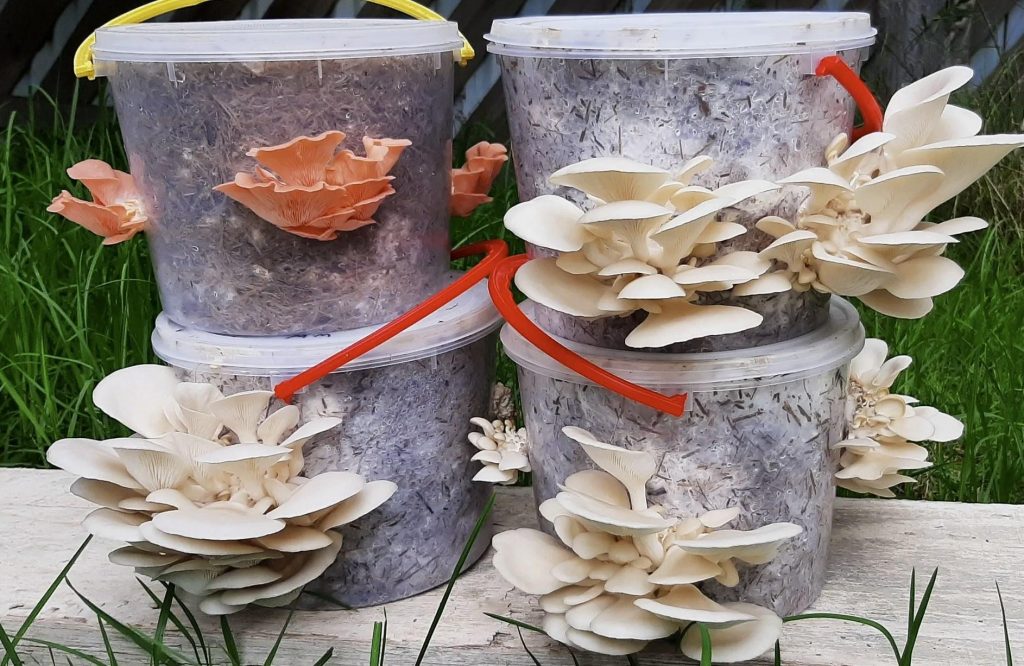
- Compact: Bucket cultivation is well suited for limited spaces, like apartments or urban gardens. For example, buckets can be stacked to maximize growing capacity.
- Educational Value: This factor is often overlooked, but learning how to cultivate mushrooms using the bucket technique allows one to learn about the lifecycles of mushrooms and ecosystem dynamics.
Pros and Cons of Bucket Tek
As with all mushroom cultivation techniques, Bucket Tek also has its advantages and disadvantages.
The advantages of using Bucket Tek have been essentially mentioned above and include accessibility, simplicity, cost-effectiveness, efficiency, and versatility. Additionally, using the Bucket Tek can contribute to lowering the carbon footprint left behind by the cultivation process. This is attained by minimizing plastic waste through bucket reuse and complete recycling and by decreasing dependence on commercially cultivated mushrooms.
As for the disadvantages of the Bucket Tek, there are very few. One practical challenge involves handling 5- and 10-gallon buckets filled with hydrated bulk substrate which can weigh well over 80-100lbs. However, the more significant disadvantage pertains to the risk of contamination, which refers to anything unwanted (bacteria, mold, animal pests, etc.) in the substrate or mycelium that adversely impacts growth. Given that the Bucket Technique utilizes relatively imprecise pasteurization methods, there is potential for incomplete eradication of unwanted contaminants and subsequent crop failure.
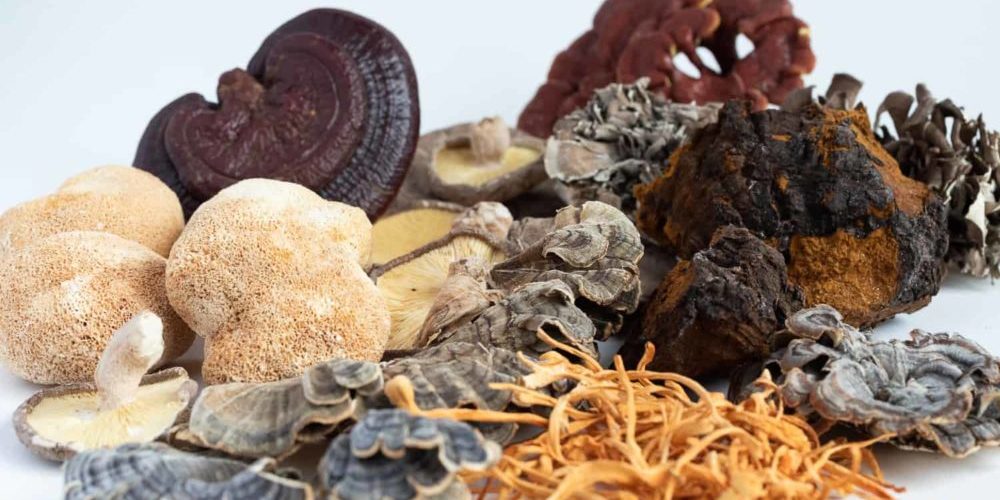
Finally, an additional aspect of the Bucket Technique that might be perceived as a disadvantage is its limitation to cultivating only side fruiting species. This is not to say that top fruiting species definitely cannot be grown using the Bucket Tek, but their yields are much smaller. As such, the Bucket Tek is better suited for species such as the Lion’s Mane (Hericium erinaceus) and Oyster mushrooms (Pleurotus ostreatus, Pleurotus djamor, Pleurotus citrinopileatus).


The Bucket Technique of growing mushrooms involves the use of various equipment and materials. It’s important to consider that the specific steps and techniques chosen, such as heat pasteurization versus lime pasteurization, might necessitate a subset of these materials. Presented below is a comprehensive list of required materials, along with their corresponding descriptions, needed for cultivating mushrooms using the Bucket Technique or Tek.
Fruiting Container – The Bucket
The fruiting container simply refers to the bucket that will contain the substrate and the mushrooms. For the Bucket Tek method, either 5-gallon (~20 liters) or 10-gallon (~40 liters) buckets with a lid are ideal. For best results, it is preferable to use new buckets as old buckets may contain chemicals or other contaminants that may interfere with mycelial growth.
Bulk Substrate
The bulk substrate is a medium that provides nutrition, moisture, and energy for the inoculated mushroom mycelium to develop. To put it simply, it’s food the mushroom.
There are several types of bulk substrates such as hardwood pellets, oak sawdust, coconut coir, chopped straw, sugarcane mulch, and coffee grounds. Which substrate you choose depends on a few key factors:
- The #1 factor which will determine which bulk substrate should be used is the species of mushroom that will be grown. Like plants grown in soil, different species of mushrooms prefer different substrates. For example, Oyster mushrooms don’t have a preference for their substrate and can thrive on anything, while Lion’s mane mushrooms prefer wood-based substrates.
- Another factor is substrate contamination. Bulk substrates are naturally contaminated with yeasts, molds, and bacteria which can harm the mushroom spawn. This makes certain substrate options superior to others. For example, coconut coir is almost free from all contaminants when compared to straw.
- Texture of the substrate is yet another factor to consider. Developing mushrooms need to breathe, as such the chosen bulk substrate should be light-textured enough to allow for air circulation. Additionally, it’s best to avoid overly fine-textured substrates like sawdust, as they can compact when hydrated and impede airflow.
Based on available data, either bricks of coconut coir or cut/chopped straw are best for the Bucket Tek.
- Coconut coir: on average, 1 brick or 650 grams of coconut coir is adequate for a 5-gallon bucket.
- Word of advice: coconut coir is sold by various manufacturers. The labeling on these products lists the amount of their specific coir necessary for a given volume, often given in cubic feet. For convenience, an average 5-gallon bucket contains approximately 0.7-0.6 cubic feet.
- Cut straw: For a 5-gallon bucket approximately 1000g of cut/chopped straw is needed.
- Word of advice: Cut/chopped straw is preferred for the Bucket Tek as it allows good air circulation. However, if pre-cut/chopped straw is not available, a bale of straw can be purchased and then cut into small pieces (<2 inches/<5 centimeters).
Substrate Supplements
Substrate supplements are additional materials that are added to the bulk substrate. These various compounds help create a favorable environment by controlling pH, moisture content, and temperature to promote healthy mycelial growth and improve mushroom yield.
Although optional, two common substrate supplements used for the Bucket Tek include vermiculite and gypsum.
- Vermiculite is an expanded mineral that provides structure to the substrate and retains water. It is frequently added to coconut coir in a 1:1 ratio for the Bucket Tek method.
- Gypsum, also known as calcium sulfate, is a mineral used to provide calcium and sulfur to the bulk substrate and to act as a pH buffer. Powdered gypsum can be added to both coir and straw and is usually added at a rate of 2-5% of the dry weight of the substrate.
Mushroom Spawn
Mushroom spawn refers to living mycelium that is grown onto a solid substrate. One can imagine it as the equivalent of mushroom seeds.
For the Bucket Tek, either sawdust or grain spawn can be used. However, grain spawn seems to be preferred as it is better suited for indoor inoculation and inoculating of bulk straw substrates.
Generally, it is best to use approximately 5-10% of the bulk substrate’s volume as the spawn quantity. For example, per 5-gallon bucket it is recommended to use approximately 2-5 pounds of spawn.
There is a direct relationship between the spawn rate and the speed and reliability of colonization. As such, for beginners, it is best to add too much spawn instead of too little to ensure success.
Substrate Pasteurization Equipment
Substrate pasteurization refers to the process of reducing the number of microscopic elements in a growing substrate. The goal of this process is to eliminate competing harmful microorganisms while leaving some beneficial microorganisms behind. Overall, this process gives the inoculated mycelium an advantage and allows it to easily germinate.
There are different methods of substrate pasteurization. For the Bucket Tek method, there are primarily two approaches to pasteurization. Depending on which process and substrate is chosen, the equipment will vary.
Hot Water Pasteurization – this process relies on soaking your substrate in hot water to kill off contaminants.
- If you’re using coconut coir for your substrate and you would like to use hot water pasteurization, no additional materials are needed. All that is needed is boiling water, the amount of which will vary based on your substrate quantity. In an ideal situation, the amount of water needed should be gauged based on the field capacity of your substrate (see below), but for coconut coir, you can estimate the volume of water needed by multiplying the weight of your coir by 3-4. For example, for 1 brick of coir or approximately 650 grams, one would need 1.9-2.6 liters of boiling water.
- If you’re using straw for your substrate and you would like to use hot water pasteurization, you will need a large tub or a bucket for the boiling water and a nylon mesh bag or a wire mesh basket to place the straw before placing it in the boiling water for pasteurization. The amount of boiling water is not important during this time as the straw will be removed and allowed to drain before transferring it over to the 5-gallon bucket. However, approximately ~10 liters of water are needed per 500 grams of straw.
Cold Water Lime Bath Pasteurization – this process relies on soaking the substrate in a highly alkaline lime bath to kill off contaminants.
- Cold water lime bath technique is only used for straw substrate and is more technically challenging and time-consuming.
- For this technique the following equipment will be necessary:
- Intermediate bulk container (IBC) such as a large tub or bucket for the substrate lime bath.
- A netted bag to place the straw in.
- Hydrated lime (calcium hydroxide) 2-3 grams for every liter of water.
- pH meter or strips.
- Protective equipment – gloves, face mask, and eye protection.
Based on available data hot water pasteurization is recommended over cold-water lime bath pasteurization as it is fast, effective, safe, and requires little to no additional equipment.
A few words about how much water is needed during substrate pasteurization and hydration.
The field capacity refers to the amount of moisture/water a substrate will hold before moisture/water will start dripping on its own due to gravity. Field capacity can be estimated by taking a handful of saturated substrate and squeezing it. If only a few drops come out, an adequate moisture content is reached. If water starts dripping or pouring out, then the substrate is oversaturated and requires the addition of further dry substrate. If no water appears, then the substrate is too dry and requires further hydration. Based on these estimation, one can deduce how much water is needed for a given substrate quantity.
Additional Equipment
A drill with a ¼ – ½ inch (8-12mm) drill bit will be necessary to make drainage, air exchange, and fruiting holes in the 5-gallon fruiting container.
“Breathable” micropore tape or brown postal tape will also be necessary to cover the holes on the sides of the bucket during the incubation process. These tapes trap moisture in while still allowing air circulation thanks to their micro-perforations.
A thermometer will be useful to measure temperatures during the pasteurization process.
You may also want to have a scale to precisely measure the weight of the components added.
A large object such as a brick or a cinder block may also be helpful by keeping the bulk substrate fully submerged during the pasteurization process.
Optionally, you may choose to use water-diluted isopropyl alcohol at a 7:3 ratio in a spray bottle to disinfect the fruiting bucket prior to transferring the pasteurized substrate.
Below is a checklist of all the possible items and equipment mentioned above:
- 5-gallon bucket with a lid.
- Bulk substrate – coconut coir (~650 grams) or chopped straw (~1000 grams).
- Substrate supplements – vermiculite & gypsum. *
- Sawdust or grain spawn.
- Large bucket or tub for pasteurization
- Nylon or wire netted bag.
- Access to tap water.
- Hydrated lime (Calcium hydroxide). **
- pH strips or meter. **
- Personal protective equipment (nitrile gloves, mask, and goggles).
- ¼- ½ inch drill bit.
- Micropore tape.
- Scale***
- Thermometer
- Brick or cinder block.
- Diluted isopropyl alcohol. ***
* Not needed if you choose to use straw as your bulk substrate.
** Based on which pasteurization method you choose you may not need these items.
*** These items are optional.
Step-by-Step Instructions
Step 1: Preparing the Fruiting Chamber – The 5-gallon Bucket.
- Using a ¼ or ½ inch drill bit, drill holes on the side of the 5-gallon bucket around its full circumference, approximately 15-20 centimeters from each other. These holes will allow for ventilation and fruiting.
- Optionally, using the same or even slightly smaller drill bit, several holes can be made on the base of the bucket. These holes will allow for any excess water and/or liquid metabolites to have a way of draining out, preventing substrate oversaturation.
- After the holes have been drilled, inspect, and disinfect the bucket using the diluted isopropyl alcohol solution to minimize any risk of contamination.
- Lastly, the holes should be taped up using micropore tape.
Step 2: Selecting the Desired Substrate
- Decide on the bulk substrate that will be used for the bucket technique, as mentioned both chopped/shredded straw (~1000 grams) or coconut coir (~650 grams) will work.
- If coconut coir is chosen, ensure that vermiculite (1:1 ratio) and gypsum (2-5% of substrate dry weight) are added.
- If the straw is chosen, ensure that it is chopped or shredded into small pieces (2 inches/<5 centimeters).
Step 3: Pasteurize the Bulk Substrate
Depending on the bulk substrate, chosen method of pasteurization will vary. For coconut coir, hot water pasteurization is recommended. While for straw cold water lime bath pasteurization is preferred.
Hot Water Pasteurization for Coconut Coir
- Pasteurization takes place at temperatures ranging from ~75°C or ~170°F. At these temperatures, harmful bacteria are killed while beneficial thermophilic bacteria are allowed to grow. However, if these temperatures are exceeded the opposite will occur and the substrate will become a minefield of harmful microorganisms.
- Boil the appropriate amount of water for the given coir amount (~2 liters per 650 grams).
- Continue boiling until the water temperature reaches the range of ~75°C/~170°F.
- Afterwards, pour the boiling water on top of the coir, vermiculite, and gypsum (CVG) mix and close the lid.
- Use common sense and take proper precautions (hot pads, move slowly, pour from a reasonable height to avoid splashing, etc.,) when dealing with hot liquids to avoid burns!!!
- Watch the temperatures for the next hour or so to ensure that the substrate mixture does not exceed 170°F.
- If your CVG mixture temperature does exceed 170°F, it is not the end of the world as the mixture doesn’t contain all that much beneficial thermophilic bacteria. At this point, a type of “partial sterilization” will occur.
- After ~60 minutes, stir the mixture with a large spoon/ladle. Ensure adequate substrate hydration by checking the field capacity and if necessary, make the necessary adjustments (i.e., add more coir or add more water).
- Be careful, the mixture will still be hot!
- If the substrate is adequately hydrated, let it cool down completely to room temperature and use it as soon as possible to avoid further contamination.
Cold Water Lime Pasteurization for Chopped Straw
- Lime-based pasteurization relies on the ability of hydrated lime to rapidly increase the pH of the water bath which kills off unwanted contaminants while leaving the mycelium unharmed as it is more stable in alkaline (high pH) environments.
- Start by filling the intermediate bulk container (IBC) such as a larger bucket or a bin with regular tap water. Add in hydrated lime (2-3 grams per 1 liter) and stir.
- Hydrated lime can irritate eyes, skin, and lungs; therefore, it is advisable to don appropriate personal protective equipment (gloves, mask, goggles, etc.,) at this stage.
- At this stage it is important to monitor the pH of the lime bath using either a pH meter or strips. Once the pH of the lime bath has reached 11-13 on the pH scale, it is ready for pasteurization.
- The chopped straw should now be placed in a netted bag or any other container that will allow the straw the be submerged in the lime bath.
- The straw tends to float, as such it may be helpful to place something heavy (brick, cinder block, etc.,) on top of the straw bag to ensure full submersion and pasteurization.
- The straw substrate should remain submerged for a full 12-24 hours, after which it can be removed.
- Once removed, the straw should be hung out to drain in a clean environment. It takes approximately 1 hour for the straw to drain for it attain “field capacity”.
Step 4: Add in Spawn Substrate
- This step simply involves combining the bulk substrates with your chosen mushroom spawn.
- As mentioned, 2-5 pounds of spawn are appropriate for a 5-gallon bucket filled with bulk substrate.
- Mushroom spawn can be mixed directly into the coir/vermiculite/gypsum mixture or can be layered in between the straw layers, packing each layer lightly (~5cm of straw followed by a thin layer of spawn).
- Ensure that the topmost layer is the substrate.
- Place the lid on the bucket, and label it with the date.
Step 5: Bucket Colonization
- The inoculated bucket should be placed in a somewhat dark place, at room temperature (18-24°C).
- Avoid Direct sunlight
- Direct and constant wind/breeze
- Ensure that the substrate stays adequately moist and doesn’t dry out.
- Ensure adequate aeration.
- On average colonization takes 10-14(21) days.
- After a week or two, you can start checking for signs of colonization such as classic white cobweb-like mycelium, or for oyster mushrooms the characteristic anise-like sweet smell.
- Lack of mycelium or a funky, damp smell are usually signs of contamination or inadequate conditions.
Step 6: Induce Fruiting
- After colonization of the substrate has occurred, it is time to trigger fruiting.
- There are three environmental factors that trigger fruiting:
- Warmer temperature (~30°C)
- Fresh oxygen-rich air
- Humidity
- To achieve these conditions:
- Remove the micropore tape from the spawning bucket holes.
- Place the bucket in a location that allows for both indirect light as well as shade. (i.e., garage, shed, under tree shade, etc.,)
- Avoid constant wind/breeze as this can dry out your substrate or the newly developing mushroom pins.
- Spray the holes and the developing pins with water several times per day to keep them moist and maintain humidity.
Step 7: Reap the Benefits: Harvest
- On average, mushrooms are ready to be harvested about a week after the first pins appear.
- Another rule of thumb is to harvest mushrooms when the caps of fruiting start to flatten out and begin to turn upwards.
- Fruiting bodies can be harvested by cutting off or gently twisting off entire clusters that emerge from the bucket holes.
Frequently Asked Questions
How long does colonization usually take?
As mentioned, the average time for substrate colonization is approximately 10-21 days. However, the exact time will depend on the species of mushroom, how much mushroom spawn was used, and atmospheric temperature.
Why is my bucket not pinning/fruiting?
There are several reasons why your inoculated substrate may not pint or fruit. The main reasons include failure to colonize due to contamination and inadequate moisture levels.
The pins started growing out the bucket holes, but they have now stopped growing. Why?
The most common reason why pins stop growing, also called “aborting”, is due to a drop in moisture content.
Sometimes rehydration can save the pins, but if the pins have gotten too dry they will not grow regardless of how much water you spray on them.
After harvesting, is it possible to grow more mushrooms from the same bucket?
Yes, this is called the second flush. Often, if adequate conditions are maintained the same inoculated bucket can produce up to four “flushes” of mushrooms.
References:
- Thomachan S, Mathew D. An environmentally friendly and cost effective technique for the commercial cultivation of oyster mushroom [Pleurotus florida (Mont.) Singer]. J Sci Food Agric. 2013 Mar 15;93.
- Hoa HT, Wang CL, Wang CH. The Effects of Different Substrates on the Growth, Yield, and Nutritional Composition of Two Oyster Mushrooms (Pleurotus ostreatus and Pleurotus cystidiosus). Mycobiology. 2015 Dec;43(4):423–34.
- Ab Rhaman SMS, Naher L, Siddiquee S. Mushroom Quality Related with Various Substrates’ Bioaccumulation and Translocation of Heavy Metals. J Fungi. 2021 Dec 31;8(1):42.
- Sánchez C. Cultivation of Pleurotus ostreatus and other edible mushrooms. Appl Microbiol Biotechnol. 2010 Feb;85(5):1321–37.
- David Meigs Beyer. PennState Extension. 2023. Growing Mushrooms – Microbial Activity in Substrate.