

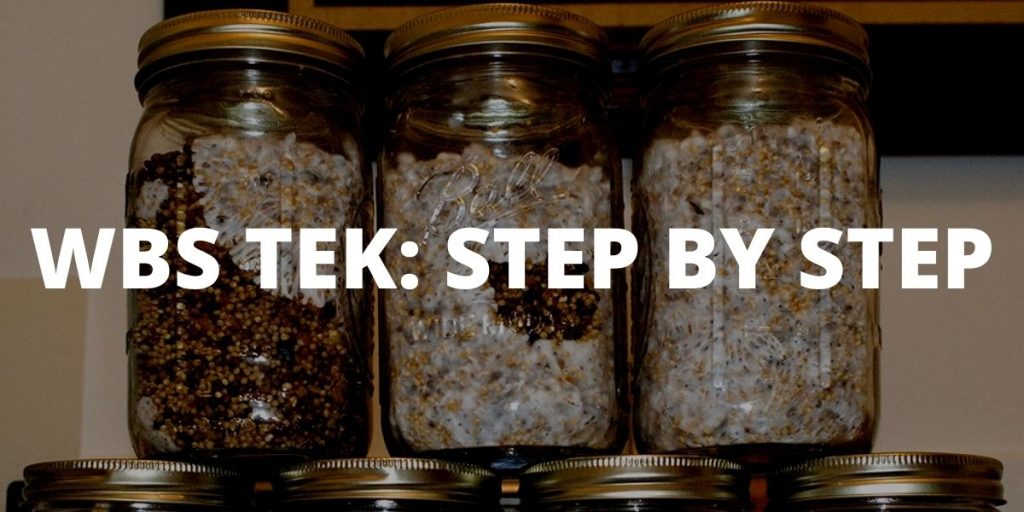
WBS tek simply means using a bird-food seed mix as a substrate for mushroom cultivation.
Most cultivation methods involve making sterile jars of some kind of grain, injecting an appropriate liquid spore culture, and then allowing the mycelium to colonize the grain. Once the jars are fully colonized, the grain can be used to colonize a bulk medium, such as manure or straw, for a higher yield, or the colonized grain can be encouraged to fruit, either in the jars or not. Popular grains include brown rice flour, popcorn, or millet. A good birdseed mix is mostly millet and has the advantage of being easily available at very low cost.
Of course, each kind of grain requires its own tweak to the basic method. WBS tek is just any method that works well for wild bird seed mixes. The following is one version of WBS tek[i].
Why Use WBS Tek?
Why not use WBS tek? For many people, the choice of tek is close to arbitrary in that all methods are similar and, if done correctly, produce a good crop of shrooms[ii]. The important thing, especially for inexperienced growers, is to use some established method; hybrid teks invented on the fly by newbies tend not to work.
That being said, there are differences between methods that do make a difference. Some methods work better for certain circumstances, and for certain people, than others.
WBS tek is not usually recommended for first-time growers, since small mistakes are more likely to lead to crop failure than in, say PF tek with brown rice flour (BRF). But for those with a little experience behind them, using birdseed results in faster colonization time and greater yield[iii].
Some mushroom strains do have their own preferences, though. A strain that really only does well on BRF is a poor candidate for WBS. Give the mycelium what it wants.
Materials Needed
The first thing to do when growing mushrooms is to gather all necessary supplies. Getting halfway through the process only to realize some key ingredient is missing would be a real problem.
- Liquid spore culture in syringes; you can’t grow magic mushrooms without spores to start with!
- Glass canning jars with lids; size matters less than shape, but pint-size works well. These are my favorite jars for WBS Tek.
- A bag of wild bird seed mix; be sure to pick a brand that has not been treated with a fungicide. Fortunately, fungicide is only really common in the more expensive brands. Most growers recommend choosing a mix that has no corn and few or no sunflower seeds. This is one of the only Bird Seeds I can confirm has no fungicide. Buy This.
- A supply of clean water; a working household tap definitely qualifies.
- A pressure-cooker. This is my Favorite Pressure Cooker. It’s expensive but it will last your lifetime. Buy once, cry once.
- A large, very fine-mesh strainer. This strainer works great.
- A supply of Tyvek. Any Tyvek will work.
- A working stove. I hope you have this already.
If the jars have not yet been prepped for mushroom growing, you’ll also need:
- A drill. I hope you have this, but if you don’t it’s a good excuse to buy my favorite drill!
- Electrical tape. Anything will do.
- Polyfill; this stuff is optional because it’s for an optional step. Good polyfill without chemicals.
Step by Step Instructions
Are the jar lids prepped yet? If not, that must be done first.
- Drill a small hole (5/16” works well) in each lid and cover the hole with waterproof tape.
- If you want an air vent—some growers use these, others do not—drill a second, larger hole (half-inch works well) and pack it with polyfill to act as a filter. Don’t let the polyfill cover the smaller hole, though, or inoculation will be difficult.
Note that while it’s possible to drill a hole in a whole stack of lids at once, doing so is a good way to get injured.
Now, on to the next steps.
- Measure the seed with a good scale. Use only enough seed to fill the jars halfway—the seed will expand as it’s hydrated.
- Pre-soak and clean the seed. You can use the any pot for this. Just pour the grain in, mix with enough water to cover generously, and stir. Hollow seeds and any sunflower seeds will float to the top—most growers recommend removing these along with any other floating debris. You may need to stir and skim several times until no more floaters come up. Then set the grain aside over night to soak.
- Drain and rinse the seed. Pour the grain into the strainer and let it drain completely. Then rinse it with clean water until the rinse-water comes out clear (not brown).
- Simmer the seed. Put the rinsed grain in a clean pot and cover generously with water. Bring to a boil, then turn down the heat and simmer. As soon as a few of the seeds split (picture tiny, wet popcorn), turn the heat off. The important thing here is to hydrate the seed fully, not to completely cook it.
- Rinse and drain the seed. Pour the seed back in the strainer and rinse until the rinse-water turns clear. You are rinsing away any starch or other material that has escaped the seeds during the simmering process. Then cover and set the strainer and grain aside for at least an hour so it can drain fully—if it’s still dripping, even slightly, it’s not drained yet.
- Jar the seed. Fill each jar ¾ full with seed, then carefully clean away any seed that has clung to the rim (clinging seed could offer stepping-stones for bacteria, should any get in under the lid—the ring of absolutely clean glass at the top of the jar is an important last barrier to contamination). Put a piece of Tyvek in each jar with the moisture- retention side down, then put on the lids and screw on the rings. Cover each lidded jar with foil to keep water out of the holes during sterilization.
- Sterilize the jars. Load up the pressure-cooker, putting something on the bottom, under the jar, to keep the glass from contacting the bottom of the cooker directly—this prevents the glass from breaking from the heat. Cook the jars at a pressure of 15 PSI for two hours. The jars will require some time to cool.
- Shake and inoculate the jars. When the jars are cool, shake them vigorously to break up any clumps. Then sterilize the needle of the syringe with a flame, let it cool, and inject the spore culture through the tape-covered hole of each jar. Angle the needle in so the culture will squirt out close to the inside of the glass—that way, you’ll be able to see the mycelium as soon as possible after germination.
- Incubate the jars according to the needs of the strain you are using, then birth or fruit the jars or use them to inoculate bulk substrate as you see fit.
Lastly, if WBS Tek seems too complicated for your skillset you can try using growing kits, grow bags or even other grow methods like Monotub Tek, and Shotgun Fruiting Chamber (SGFC).
Refrences:
[i] Coste (2020). WBS Tek. pHenohunter
[ii] Calistoner (2010). WBS verses BRF. Mycotopia
[iii] Moth (2003). PF Tek or WBS for a Newbie? Experts? Shroomery
Love this, messing with the Bs right now