There are many ways of growing psilocybin mushrooms. Most methods involve first incubating the fungus in jars of grain and then, when the grain has been fully colonized, removing the clump of grain and mycelium from the jar and inducing it to fruit (that is, produce mushrooms) by one or another method. Popcorn tek[i][ii] is one way of doing the first stage, the grain in the jars.
Basically, if the grain in the jars is popcorn, that’s popcorn tek, though there are a few details you have to get right for best results.
Whether you use Popcorn Tek or BRF (brown rice flour) or Uncle Ben’s tek, or some other thing really only has to do with how you set up the jars. The other steps of mushroom cultivation, from inoculation, to incubation, to birthing, to fruiting, and so forth are going to be the same either way. For that reason, this article is only going to describe how to set up the jars. We have covered various options for the other steps in other articles.
It’s worth noting that in most jurisdictions, cultivating psilocybin mushrooms is extremely illegal. Know what the law is in your area, and do not get sent to prison.
Pros & Cons of Popcorn Tek
As with everything else, there are advantages and disadvantages in using popcorn tek[iii]—though it’s worth noting that not all writers agree on what these advantages and disadvantages are. See below for details. In general, popcorn is seen as a good beginner’s tek, though it’s not often used by experienced growers.
Cons
- Sometimes popcorn doesn’t do well cased and fruited as a cake. Spawning to bulk works better.
- Sometimes popcorn kernels are relatively large, the mycelial threads have trouble getting from kernel to kernel, or from the kernels to a bulk substrate, though this can be fixed by adding coffee or gypsum in with the corn.
- Sometimes the nutritional value of popcorn is low (from the perspective of a fungus), leading to poor yields.
Pros
- Popcorn is easy to find in grocery stores.
- Even beginners can get good results fairly easily.
- Colonization time is often very fast.
Instructions
Note that in the following instructions, we assume that you have access to an ordinary kitchen and its equipment and supplies—that’s why we don’t list “a kitchen sink” among the materials needed, though really having a kitchen sink is useful for this tek. We’re also assuming at least some prior knowledge of mushroom growth. But if you don’t have that knowledge, if you don’t know what “mycelium” is, for example, there’s no shame in that. Just do a little more reading and then come back here.
Materials Needed
- 2 pounds plain, un-popped popcorn – I’ve found best success with Orville, but anything should work.
- Some good Mushrooms Jars, 3 one-quart-sized canning jars with lids should work- These will work.
- Polyfill – It comes in different sizes, pick an appropriate size.
- Micropore tape – Any brand will do.
- Enough aluminum foil to cover the top of each jar
- A pressure-cooker – This is what I use.
- A strainer or colander large enough to hold all the popcorn – This is what I use.
- A drill with both a large and a small bit – You should have a drill, but I use Milwaukee.
Note that you can make larger batches—to fill six jars, use four pounds of popcorn, and so on. Also, please note that this is PLAIN popcorn, not microwaveable popcorn (which usually has butter flavoring already included). Finally, make sure your pressure-cooker is working properly, since a cooker with a blocked safety vent, for example, could be extremely dangerous.
Step by Step Instructions
- Soak the popcorn for 24 hours. Use enough water to cover the popcorn two inches deep.
- Prep the jars. You can do this step at any time, but doing it during soaking is convenient. Simply drill two holes in each lid, a large one and a small one (take appropriate precautions for safety!). Cover the small hole with micropore tape. Fill the large hole with a bit of polyfill. The small hole is the port through which you will inoculate the jars. The large hole is for air exchange during incubation—fungi, like animals, must be able to breathe.
- Boil the popcorn. You may need to add more water, as some will have absorbed overnight. Bring the corn to a boil, then simmer for 45 to 60 minutes. Stir periodically to keep the kernels on the bottom from burning. The point of this step is to force the kernels to absorb as much water as possible so that the fungus will be able to drink. When the corn is done, the kernels should be soft enough that you can squish one between your fingers (be careful—they’re hot!)
- Drain the popcorn. Pour the corn into the colander to drain out the cook-water, rinse in cold water, and then set aside to drain thoroughly for 30 minutes. The water should be in the kernels, not on them. You don’t want the fungus to drown!
- Fill the jars. Fill each jar ¾ full with the cooked corn. Make sure the glass above the corn is clean, without pieces of corn sticking to it—this clean gap between the lid and the corn is an important barrier against contamination. Put on the lids and cover the lids with foil. Note: you can pre-heat the pressure cooker while filling the jars.
- Pressure-cook the jars at 15 pounds of pressure for an hour. The hour starts when the cooker comes up to the right pressure, not before. Pre-heating the pressure-cooker before you load it may shorten the time it takes for the cooker to come up to the correct temperature—thus reducing moisture loss from the jars. The foil on the jars keeps extra water from getting in. Be sure to use the cooker safely according to the manufacturer’s instructions, and to set up the jars in the cooker on some kind of rack so that they are not in direct contact with the cooker’s bottom, only with the water. You wouldn’t want the jars to crack.
- Cool the jars. When you first open up the cooker, the jars will be extremely hot. If you must handle them, do so with oven mitts and due caution. Do not attempt to cool the jars in cold water (they’ll crack), and do not put them on any surface that could be damaged by heat. You could simply leave them in the cooker for a while. Cooling will take a number of hours.
- Inoculation and so forth: you do not have to inoculate the jars right away, but you shouldn’t leave the jars to sit unused indefinitely, either, as they could begin to dry out. How the next steps work will depend on what other teks you’re using for this particular grow.
Next Steps
As we explained earlier, we’re not going into a lot of detail here, just touching on what the next steps will be.
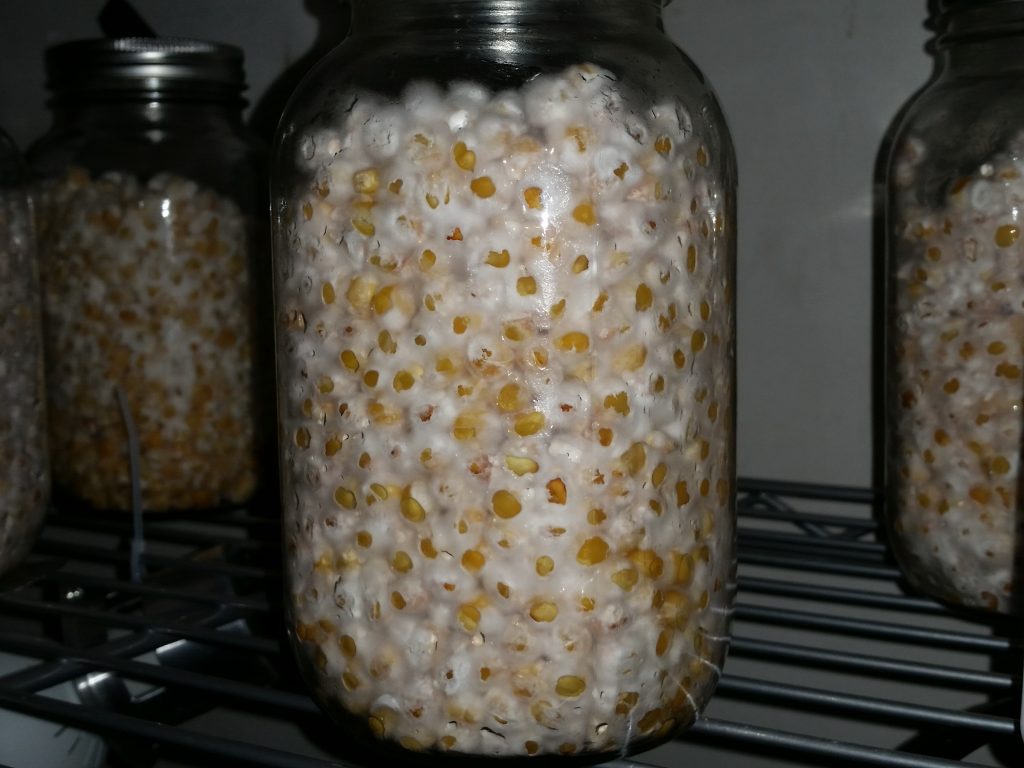
You can inoculate the jars with either spores or liquid culture. In either case, you’re going to inject the material through the micropore tape using a sterilized needle. The jars then need a warm place to incubate—the temperature depends on the type of mushroom you’re growing. Shaking the jars every week or so speeds colonization, but shaking them too often will slow colonization instead. The growing mycelium should be white. Green or other colors indicate contamination. Colonization time will depend on the species and strain you are growing, but it’s likely to be about two weeks.
When the jars are fully colonized, it’s time to move on to fruiting. You may be able to induce the fungus to fruit in the jar, though few people do that. The colonized popcorn will form a solid cake or block, so you can simply slide the cake out, put it into fruiting condition (there are various teks for that) and fruit it in a shotgun fruiting chamber. Alternatively, you can break up the cake and use it to inoculate a tub-full of a bulk substrate, such as horse dung.
Although some people claim that yields are poor with popcorn tek, others insist yields are large. Most likely, the genetics of your fungus your choice of fruiting method, and how well you follow the tek you choose all have more to do with yield size than your choice of popcorn tek does.
References:
[i] Deviant (2004). Popcorn Tek w/Pics Updated.
[ii] Lemunhed (2003). Popcorn Pros and Cons.
[iii] (n.d.). How to Make Popcorn Grain Spawn (Popcorn Tek)